Tuesday 8 December 2015

Design team make...Batch Making Christmas cards


Hi everyone...Genny here. As I started making my first card here, I suddenly thought that I needed to make a lot of Christmas cards in a hurry and got to think about batch making some..so I did and here they are. I've already made a lot of Christmas cards but have given little thought to my own. At this time of year I seem to be playing catch up with all the orders and getting ready for Christmas..as I'm sure many of you are. Batch making cards seems to be the way forward. The first step is to find a stamp that you like and then go with it. I began with this wonderful stamp from Stampendous Stamps...which is available from Julie here at JB-Crafting Supplies.


I began by stamping my image using my memento inkpad and I did four of the image. I then coloured them all in using my promarkers but chose different colours. I then found some Christmas papers in my stash...Julie has a wonderful collection and covered some 6x6 cards with the paper.


I then cut out the snowmen into a square..you could use whatever shape you liked..and then added a peeloff border. Finally I added the greeting and there I was with four cards in the same time that it normally took to make one. If, like me are behind with your cards..why not give it a go.


If you are short of any Christmas inspiration..why not take a look round what Julie has for sale. The thing that I love with Stampendous Stamps is how clear the stamped image is and no matter what the size of stamp..they stamp really cleanly. I hope that you all will remember that card making is supposed to be fun..so don't get stressed..just enjoy what you're doing. And with the weather being what it is..there is nothing better but being inside crafting. So until next time..take care and happy crafting.

Monday 23 November 2015

Design team makes...Christmas Cards


Hello everyone...Genny here. As most of you are, I'm desperately trying to make my Christmas cards. Apart from the orders that I have to complete..I have my own to make. And as I have a litter of kittens taking over the house..it's a bit of a job..lol. As I write, the kittens are causing chaos in the parlour. When it comes to Christmas cards I seem to find it harder to make my own..when I get orders in the customers know what they would like..so it's easy. With my own I have to find something I really like and they have to be easy because normally I leave myself very little time. That's one of the reasons I love the Margaret Tarrent paper pads that have been produced by Joanna Sheen. I was lucky enough last Christmas to have been given one by Julie here at JB Crafting to work with...and have still got some left. The images are fantastic and very nostalgic. They remind of the images in books that I had as a little girl.


On the pads there are the images and greetings, alongside some easy decoupage. I found it a great way to also use some of my huge stash of Christmas papers.


The other thing that I love to do is to find a stamp that I love and batch make a lot using the stamp as the focal point. As Julie stocks  a fantastic range of Stampendous Stamps...I picked this wonderful image of the little House Mouse, drawn by the very talented Ellen Jareckie.


I just love this image of the little mouse balancing the ornaments on his nose. Again it is a perfect way of working through my stash. I have to say that I collect papers..I may never have to buy any more..but I know that I will..lol

I hope that I will have given you a little inspiration. Julie has such a wonderful shop filled with fantastic goodies...an Aladdin's cave of inspiration..so if you are wondering what to do..why not pop in and take a look. I hope that the weather is being kind to you, wherever you are...we have had snow here..so it's a perfect time to stay in and craft. So until next time..take care and happy crafting.

Wednesday 11 November 2015

Design team makes...using Hobby Art


Hello everyone....Genny here. What a week so far. I had meant to blog on Monday but with the weather and the joys of BT..it just didn't happen. I hope that the weather is being kind to you, wherever you are. We have had serious flooding in the village here..it was unbelievable. I have lived here for 25 years and have never seen it as bad as it was. People had to leave their cars on high ground and wade through water that was above their knees. There are waterfalls cascading down the mountains..where there was none last week. I was lucky because I'm situated at the top of the village. So with all the rain..which is still continuing today..I'm keeping warm and staying in to craft.

My first make is a new home card. It was created using the Hobby Art Townhouse scenic stamp range. I created a little row of cottages and a little garden scene. For the next card, I extended the scene and used it to make a christmas card. I stamped the houses,coloured them and added them to an oval. I also stamped the christmas tree and snowman. I coloured the top half of the oval to look like sky and stamped the santa and reindeer on to it.


And as I had a spare circle..I just had to make a sheep card..lol. The stamp of the sheep is a Penny Black one. I do have a collection of sheep stamps because living where I do..I'm always surrounded by them. And they always make me smile. For this one I stamped and coloured my sheep and then cut it out. I coloured the sky and added the sheep. I then added some snow..using white acrylic and of course I had to add some glitter. All the colouring was done using my promarkers, I added snow using white acrylic and the glitter was diamond dust..but any white or crystal glitter would do.


The great thing about making cards using these stamps is that it quite easy to batch make and you can add as much or as little detail as you want to. So until next week..and I hope that the weather is kind to you all...take care and happy crafting.

Tuesday 3 November 2015

Design team makes...Christmas Bauble Cards


Hello everyone...Genny here. The next three Christmas cards are a continuance of the cards that I made last week. I decided to make a bauble shape and decorate within the shape.


I began by cutting a bauble shape out of some thin card and then used that as a template to ink inside. I then used a mixture of Hobby Art 'scenic' stamps and my tapestry stamps to decorate.


As you can see, I went from a scenic in blue...to a snowflake decoration in blue to a snowflake in pink. Then I added glitter, jewels and ribbons. It was great fun to make and if you don't have the confidence to cut the shape..just take a look at the templates or stencils that are available.

I hope that you have found a little inspiration. So until next time...take care and happy crafting.

Wednesday 28 October 2015

Design team make...Christmas Cards


Hello everyone...Genny here. Today I'm sharing two Christmas cards made using the Hobby Art 'Scenic Stamps'. I just love this range of stamps and have used them so much. Everytime I use them, I come up with a different scene..which I suppose is the aim of them..lol.but I so enjoy using them. To make both these cards I have only used 1 distress ink. To begin I cut an oval, stamped the scene, using my distress ink and then coloured using the ink pad. To do this I pressed the ink pad onto my glass cutting mat and added some water using a paintbrush and coloured where I thought it needed it. I then inked the edge of the oval using a blending tool..still using the same inkpad. I also created a larger oval mat, coloured with my blending tool. I also added some glitter to the scenic oval. I finally fixed both ovals to a 6x6 card, to which I had covered with a blue based background paper from my stash. The card below was made exactly the same way...I just created a different scene.


Unfortunately you can't see the glitter as well on the second..but in real life it's as if the sheep are standing in the snow on a frosty morning. Something I see alot here in the winter months in the mountains. For my own Christmas cards I will be doing a number of these. It is so much fun creating the scenes and if you create one that you really love..it is easier enough to recreate it.

If you need anything crafting wise..just ask Julie here at JB-Crafting Supplies. As I always tell everyone..she is an Aladdins cave of wonderful crafting goodies. It's well worth a look. So until next time..I hope the weather is being kind to you all and that you have begun making your Christmas cards...take care and happy crafting.

Monday 12 October 2015

Design team make..The Wishing House


Hello everyone..Genny here. Following last weeks dot decorated frame and door hanger, I decided to decorate this house shape and create a gift..a wishing house. I had seen one done before and thought it would make a lovely gift. The house shape itself was cheaply bought and I began by giving it two coats with acrylic paint in a bluebell shade. I then used my dot painting technique on the sides and the roof slants.

I then thought what wishes I would like to give to my friend. I made paper shapes which I wrote the different wishes on...love,laughter,peace,joy.etc. I then used a distress ink to blend on the paper and stamped on every piece with a small leaf stamp. I have yet to add the little ornaments to it. One that I'm going to make is a little bottle with some glitter in it..so she never loses her sparkle. Thinking on the same lines I may add some marbles so she never loses them as well. A bit of fun that will make her smile...what more could you want in a present to give to a friend.

As I said last week..all you need to do the dotting is available from Julie here at JB-Crafting Supplies. Acrylic paints and a couple of ball tools is all you need. I have bought all my acrylics from Julie and they are perfect to use on projects such as this. Keep you eyes out for blank shapes that you can buy and paint on..or look at things that you have in your home that you can alter. So until next week..take care and happy crafting. 

Wednesday 7 October 2015

Design team makes...Christmas Sheep and more


Hello everyone Genny here. I tried so hard to blog these cards yesterday but BT just wasn't playing..lol. So here I am featuring the sheep stamp again from Hobby Art. Everything that I have used on these cards is available through Julie here at JB-Crafting Supplies.

I wanted to share the card below to show that though I have bought the sheep set to make my christmas cards, I can see me using them all year round. There are lots of little other stamps like the sunglasses and straw hat,which I have put on the sheep and turned it into a summer stamp. I know lots of people that this would make smile.


And below is something that I made after watching a television programme. Strange I know but I was amazed by the price of what they were selling, knowing that you could buy everything from Julie for at least half the price. All you need to make the items below is your choice of acrylic paint and two ball tools. The pattern is based on dots and if you can dip your ball tool into some acrylic and drag it in a swirl, that;s all there is to it. Next week I will do another couple of projects and show you how easy it is. I know that Julie has door hangers available and the frame is just a cheap one that I picked up. I think that the two together would make a lovely present.


So until next week...take care and happy crafting.

Wednesday 30 September 2015

Design team make...The Christmas Sheep


Hello everyone...Genny here again. Today I'm featuring my new stamp from Hobby Art. Everytime I see these stamps they make me smile and I just had to share them with you. On the stamp sheet there are 3 different sheep and lots of accessories.I decided to put the bobble hat on one and the Santa hat on the other. I created an oval scene to put them onto..I just drew some hill shapes and glittered it.I had two different papers in my stash which I layered onto some purple card. For the sheep, I stamped them with my memento inkpad and coloured them with my copics,Then I cut them out and layered them on top of the oval.

For next week I will create some more christmas cards for you and some cards using these same stamps but not for Christmas. I like to know that I can get value for money with every stamp set I buy...so therefore I am so pleased that I have the option of using my sheep all year round.

If you like this stamp set..just ask Julie here at JB-Crafting. And as I always say she has an Aladdins cave of fabulous embellishments..always the best place for all those little must have dodads. So until next week...take care and happy crafting.

Monday 28 September 2015

Christmas is coming..Design team makes


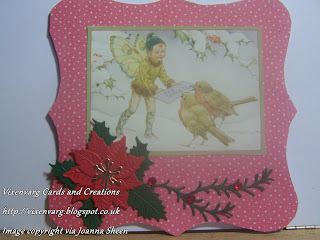
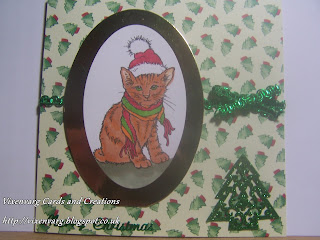
Hello everyone..Genny here. Well it's come to that time when us crafters need to be thinking about Christmas cards. Below are a selection of last years cards..all made using different mediums. The one above is from a paper pad brought to us from Joanna Sheen and available from Julie here at JB-Crafting Supplies. The one below is from the Stampendous Range of stamps..another line that Julie has a wide range of.


To decorate the cards, I always use a wide range of embellishments..either bought from Julie or die cuts which I have made using dies also bought from Julie.


The two cards, above and below are also from the Margaret Tarrant paper pad..produced by Joanna Sheen. Lovely images and so handy to have in your stash.


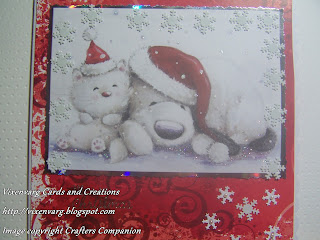
The other great way to produce your christmas cards is to find some cdroms and print your own. Below are two cards..one from a Joanna Sheen cd and the other from a Crafters Companion. Just ask Julie what she has available and you'll be off. It can be daunting when you are thinking about creating your own cards but once you get into it..you're away. I really enjoy Christmas crafting..it's not christmas for me unless everything is covered in glitter. At this time of year even the dog ends up twinkling...lol


So have you started yet?  I have been thinking about it and the lucky thing for me is that I also work on another design team that makes christmas cards all year round. Some years I have a theme but usually I just work with lots of different types of images..digital designs, images from christmas themed cdroms and stamping. I find that I can work with the same image year after year and they're never the same. I find that I create different embellishments and that my cards will have a totally different feel every time. I have a stamp of four geese which I must have had for 15 years and every year it comes out and helps me produce a different look even though it's the same main image. So the best thing to do is to keep your eyes peeled for different embellishments to ring the changes.


On Wednesday I will be back sharing a new set of stamps from Hobby Art which I think will form the basis of my cards for this year.
So until then my thoughts will be on Christmas crafting. If you have started your makes..why not share them. I would love to see what you are doing. So until Wednesday...take care and happy crafting.

Wednesday 2 September 2015

JB Crafting- Supplies....Home makes


Hello everyone...Genny here. After last weeks makes, I decided that I wanted to make a hanging flower to fit alongside my dream plaque and door hanger. I made this flower, managing to use lots of the little bits that I had hanging around my craft studio. I have always had a collection of beads..for the use in a bright idea that I never got round to..lol so I was determined to use them. I am hoping to get a better picture of the flower but it was a hard thing to photograph with no help. I will take a picture of it when it's in it's place in my bedroom.

The flower has beads above it and a string of beads at the bottom, which give it a little weight to hang straight. The flower itself started with an idea which I had when I was just about to throw a kitchen roll middle away. I cut it into six strips and then painted them with my acrylic paint which I had bought from Julies shop. I then attached some backing paper..again from the shop to the back of the roll strips. I then cut the petals out and glued them together. I created the strips of beads and attached them to the top and the bottom of the flower. I cut a circle of the backing paper twice and attached it to the flower centre. Onto that I added a smaller circle of glitter paper and finally added a large jewel to the very centre. I hope to make 5 strips of flowers and hang them along the wall in my bedroom. For all the paints, jewels and beads just take a look at Julies stock...it really is an Aladdin's cave of crafting goodies.

When I was about to write this blog, I looked through my photographs and realised that I had made quite a number of pieces to decorate my home. I have loaded them below,,in the hope that they will give you a few ideas. If you have any questions, please feel free to contact me.

I hope that the weather is being kind to you wherever you are. Here in the mountains it can't make it's mind up whether to rain or not. I'm having quite a time to keep some wet cats off my crafting..lol. So until next time..take care and happy crafting.


Monday 24 August 2015

Design team make...Time to Dream


Hello everyone...Genny here. I'm sorry that I didn't manage to post last week..I was so ill and feeling very sorry for myself..lol. but I'm back on form now and looking forward to getting my head down into some serious crafting.

For this weeks make I have decided to make a home decor item. I'm seeing so many wonderful items that you are possible to make as little art features in your home. I decided to make a plaque for my bedroom.All the items that I've used are available from Julie here at JB-Crafting Supplies. There are lots of different types of plaque out there...I decided to use this mdf one. I first painted it using a mixture of a pale pink and then a pale lilac acrylic paint. Whilst that was drying I stamped out the flowers. They are from a Sheena Douglas stamp which features the cherry blossom. I stamped out a number of the branches and then stamped out a number of the single flower. I coloured them all with my promarkers, and then cut them out. It was quite a job but I loved doing it. Sometimes there is nothing better than doing some cutting whilst watching a little tv. I found it to be a lovely evening. I then attached them around the edge of the plaque, adding some pearls and jewels amongst them. I then in pencil drew out the word dream and coloured it with a toning promarker. All I have left to do is to add a ribbon hanger and also to varnish it. I will use a spray varnish, just to give it a little protection. I will be hanging it in my bedroom.

On thinking about where I could put a plaque I thought about how lovely it would be to put in a spare bedroom. And also what a lovely gift it would make. You could change the colour way depending who or where it is destined for. If you have children or grandchildren, it would be a great gift for their bedrooms.

I will be back tomorrow with a matching item..using the same techniques..just another idea on the same lines. I hope that the weather is being kind to you where ever you are...we have had some spectacular thunder and lightening here in the mountains. So until tomorrow..take care and happy crafting.

Monday 10 August 2015

Design team make using a Stampendous Stamp


Hello everyone...Genny herewith my design team make for JB-Crafting Supplies. I was lucky enough to e able to work with this fabulous stamp from the Stampendous range. I made this simple card this week to send to a friend of mine who just adores shoes. I stamped the image and simply matted and layered it onto some patterned mirri and some plain black. I then just added the silver bow. It was a great stamp to work with as all the detail stamps so cleanly. The actual amount that they have managed to get onto one stamp is amazing. When you find a stamp company whose stamps work well every time..gives you confidence to use them again and again. And it like that for me with Stampendous stamps. They also have the license to work with all the house mouse range...a range which you must know by now, I love.

For next weeks make, I will show how this stamp can be used alongside a vintage make. The same stamp but used in a totally different way. Oh and to answer a question that was sent to me...for most of my stamping I use a memento inkpad..normally in tuxedo black. That's so I can use my alcohol pens to colour onto it if I want to. I use a Versomark for embossing and a Stazon for stamping onto acetate and glass. For inking backgrounds and for stencil work, I tend to use the Tim Holtz Distress range. There are many different types of inkpad out there but once I've found something that works for me, I tend to stick to it. One more that I have remembered is that I use a Versafine in black if I intend to watercolour. I hope that helps..and as I've said if you have any questions..just ask.

So until next week..I hope that the weather is kind to you all...so until then ..take care and happy crafting.

Monday 3 August 2015

Design team make...Another Tag..Another Tale


 Hello everyone...Genny here again.For this weeks make I decided to make another tag. This one continues the story of my Grandmother. I so enjoyed making last weeks, that I decided to do another. I began by covering the tag itself with some more of the beautiful paper from the set brought to us by Craftwork cards..the shabby vintage range. Both the tags and the papers are available from Julie here at JB crafting Supplies. To to be the basis of the tag I stamped this old english prayer which was from my stash but very much was the way that my Grandmother lived her life. No matter how busy she was, she always made time for her friends.

I can always remember when they got together to put the world to rights..lol. I remember the scents that they wore and their pretty dresses. Quite often when they got together they brought their sewing along and you would see their needles flashing as they chattered and laughed. That gave me the idea of the pansies. They are from a rubber stamp set by Joanna Sheen called embroidered flowers. The whole sheet of stamps reminds me of all the table cloths,chair backs and tray cloths that they spent many hours on. I am lucky enough to have many of the pieces myself and have sewn some myself to add to the collection. So in thinking of these, I stamped out the pansies and the leaves and coloured them with my promarkers, cut them out and used them to edge the prayer. For the base of the tag I used some lace stamps from my stash, then coloured them to match and then added them to the tag. Finally I added a bow and a butterfly and dragonfly.

Now as I look at the tag, I see the ladies with their sewing in my minds eye, their sewing on their laps, the laughter of their stories and as fanciful as it may seem, am transported back to a happy place. This is one of the fantastic things about tag art..it doesn't too long and you can build your own story or a simple memory...whatever you like. I even fancy having a go at one featuring one of my cats..I may do that one over the next couple of weeks.


Next week I will be working with another wonderful stamp from the Stampendous range. Julie has a wonderful collection of stamps in the range of crafting goodies she has instore.If you ever have any questions about anything that I have made..please just get in touch via Julies facebook page and I will be more than happy to get back to you. So until next week...take care and happy crafting.

Monday 27 July 2015

Design Team make..The Tag with a Tale to Tell


As it says in the title..this is a tag with a tale to tell. Tag art has really taken off in the crafting world and I have to say I love it. Many people would love to try scrap booking but are daunted by the size of the blank pages. If you fancy having a go..why not try telling a story on a tag.My tag is one that I put together in memory of my Grandmother and I began by going through my stash and finding things that reminded of her. I first covered the tag with a sheet of paper from the Craftworkcards..Shabby Vintage paper pads which is available from Julie here at JB Crafting-Supplies. I have two of the packs..one is pink shades and the other is blue and there are 12 papers in the pack. The one that I chose to work with is covered with sewing related pictures. As my Grandmother was an avid seamstress, I thought it would be a perfect start. There are many items on the tag which relate to her life..buttons,and lace because her sewing room always had them. I remember reels of lace and her button box. The button box was a treasure trove to me as a little girl and in fact I still have it. I only have to open the lid and am transported back to being a little girl. I put the banner on because my Grandmother was always involved with the carnival and everyone would gather at the farm to make the float. The saying always reminds me of her and her advice to trust in what you were doing and it would always be okay. I have added roses to represent her rose garden which she tended with great love but also a daisy to highlight her love of nature. She taught me to recognise all the wild flowers. I added a gardening glove and fork to tell of her time spent gardening. The two final items are the butterflies and the pearl strand. She loved butterflies and moths and I have her collection of reference books. And finally is the strand of pearls..she always wore a set no matter what she was doing..from digging in her gardens, working with the animals or cooking. They sit on my dressing table as a daily reminder of her love.
I know you may find it odd for me to write about all these memories on my design team make but I wanted to share with you my thought process while I was creating this tag. I intend to frame it alongside a photo of my Grandmother, And then I intend to work with the blue papers and make one for my Grandfather. I thought that they would look good together as a pair. Why not have a go yourself..you could do one for your grandchildren, your pets, your house or your hobbies. Tags also make great books. Cutting hols in the side and using some rings, you could add as many tags as you need.
Well I hope that you made sense of it all. When I make the one for my Grandfather, I will share it with you. For all your crafting needs please take a look at Julies shop. As I always say it is an Aladdins cave of crafting goodies. So until next week..take care and happy crafting.

Monday 6 July 2015

Design team make featuring Stampendous Stamps


Hello everyone ..Genny here. For this weeks design team makes, I have been lucky enough to work with this stamp of a giraffe from the wonderful team at Stampendous Stamps. I thought that for this weeks makes I would use the stamp as an embellishment on a card. In the next few weeks Iwill work with the stamp as the main feature. What I'm trying to do is to look at the many different ways that you can use a stamp and therefore get more value for your money.

For the first card, I had this amazing image of the two giraffes from Pollyanna Pickerings World of Wildlife cdrom. I thought that the stamp would provide the perfect embellishment. Because the main image has lilac tones, I decided to stamp the giraffe using my distress ink that also has a lilac tone. The great thing about Stampendous stamps is the clear image that you get despite how detailed it is. I have had many stamps in the past that look as if they have lots of detail but that doesn't relate to the stamped image. Some I have never been able to get a clear image no matter what I try. As is the case, many times in life..you really do get what you pay for and with a stampendous stamp..you are buying something that you will be able to use for years.

For my second card I stamped the image using my distress ink..vintage photo and you can clearly see in the photograph just how much detail there is. On this card the photograph is from an old Joanna Sheen cdrom..Animal Antics. It has been retired but I just loved this photo.


You may think that a giraffe stamp is an odd choice but I have found it perfect to add my collection. I have friends who go to feed the giraffes at a local zoo..so they would love this card. It also would be perfect for scrapbooking their day and that's just my first thought. I also have a lot of friends who travel on safaris and again this would be perfect to either send them a bon voyage card or to scrap their holiday photos. And besides everything else..giraffes are just so cute...lol

I hope that the weather is being kind to you where ever you are. Here in the mountains it's pouring down...just the perfect weather to be indoors crafting..lol. So until next time take care and happy crafting

Monday 29 June 2015

Design team makes


Hello everyone...Genny here. For today I'm lucky enough to be working with Janet Kruskamp..The Collection, brought to us crafters by the wonderful Joanna Sheen. I thought that I would go on the fashion route this week, when I found the two images that I've used in the first two cards. I loved the colourways and both images are decoupaged. Just the thing to send to a stylish friend. As I was working on these cards I sat thinking about just how many different types of image that there are on this cdrom. So I thought that I would share with you a selection of other cards made from this cd.


I hope that you enjoyed the selection and that I have managed to share with you what value for money this cd is. There has to be an image suitable for many of your friends. There is just so much on here, from cupcakes, fancy florals,cats, dogs and even pretty boutique shops.

Well the sun is shining here today in the mountains..I hope that the weather is being kind wherever you are.I'm off for a coffee before I get back to my crafting. I'll be back next week with a wonderful stamp from Stampendous, so until then take care and happy crafting.


Monday 22 June 2015

Design team makes featuring Brambly Hedge


Hello everyone...Genny here. For this weeks design team makes, I am working with the wonderful triple cdrom of Brambly Hedge. This cdrom has been brought to us crafters by Crafters Companion.There is nothing that I just don't love about this cd and find myself using it for lots of different occasions. It features the timeless artwork of Jill Barklem. I always loved the artwork of the Brambly Hedge books, purely for all the detail in every painting. When Henry was little we would spend hours just looking at the artwork and trying to spot all the little items in the picture.

The first card that I made uses the picture of the bedroom. Now who wouldn't want to sleep in that bed. The only embellishments that I have added are some diecut flowers which I coloured with my promarkers and added a gem to every centre. The gems are available to buy from Julie and are just so fabulous to use. They add so much sparkle.

The second card I thought would be a great card to make for friends who are avid home bakers...I love the idea of a large pantry. I die cut some kitchen items to carry on the cooking theme. I tend to cut my die cuts in white, then I can colour them to fit in with whatever colours I'm using. It is so much easier than trying to find a piece of card exactly the colour you need.

It is a fabulous cdrom, packed with the artwork,borders,toppers and doilies to name but a few. There are 3 discs, with discs 1 and 2 separated into spring and summer, autumn and winter. Disc 3 features 12 step by step projects and bonus papers. In the whole set there is an extraordinary amount of backing papers..just beautiful and suitable for use in all your crafting creations.

I hope that the weather is being kind to you and that you had a lovely weekend. I have so enjoyed working with this cd and hope that you will consider adding it to your collection. For anything you need...just ask Julie..as I've said she has an Aladdin's cave of crafting goodies. I know I always look to her as an amazing source of both crafting items and inspiration. So until next week..take care and happy crafting.